BPI-M2 Ultra is a powerful Quad-Core ARMv7 based SBC (Single Board Computer) with a powerful Allwinner R40 SoC and 2 GiB DDR3 RAM. BPI-M2 Berry is a Raspberry Pi compatible version of M2U with V40 SoC, an automotive version of R40, and fewer RAM (1 GiB). They are software compatible.
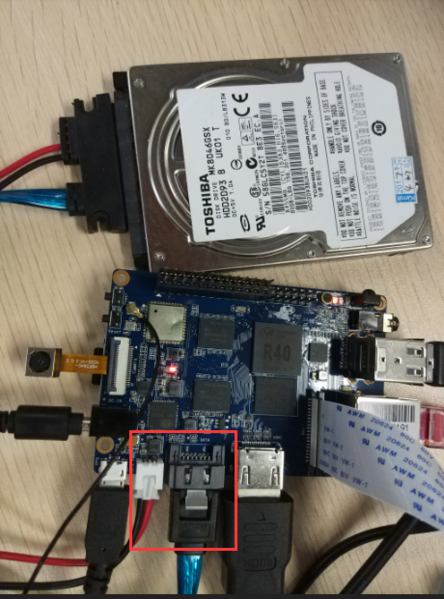
For some reason we want to boot M2U from SATA device for better IO performance. The following photo shown how to connect a SATA HDD to M2U.

From design of Allwinner, the default boot devices sequence has been cured in the BOOT ROM of SoC. The priorities of boot devices from high to low are SD card > NAND > eMMC > NOR SPI Flash.
There is no SATA device right? NP, we can load and boot bootloader and U-Boot form a SD card. By setting the kernel cmdline in the uEnv of U-Boot, it will take over the right from SD card to the SATA device at the second boot stage.
So let’s start.
First prepare a bootable SD card from official released image, like this.
Then open the 256MiB FAT partition called BPI-BOOT.
Open and edit /bananapi/bpi-m2u/linux/720p/uEnv.txt. Attention: which file you need to edit depend on which bootloader you select with bpi-bootsel, the default bootloader will load the environment configuration from 720P.
Find this part of this file.
root=/dev/mmcblk0p2 rootfstype=ext4 rw rootwait bootmenutimeout=10 datadev=mmcblk0p2
console=earlyprintk=sunxi-uart,0x01c28000 console=tty1 console=ttyS0,115200n8 no_console_suspend consoleblank=0
bootopts=enforcing=1 initcall_debug=0 loglevel=4 init=/init cma=256M panic=10
volumioarg=imgpart=/dev/mmcblk0p2 imgfile=/volumio_current.sqsh rw rootwait
Change the three MMC block device to /dev/sda2, like that.
root=/dev/sda2 rootfstype=ext4 rw rootwait bootmenutimeout=10 datadev=sda2
console=earlyprintk=sunxi-uart,0x01c28000 console=tty1 console=ttyS0,115200n8 no_console_suspend consoleblank=0
bootopts=enforcing=1 initcall_debug=0 loglevel=4 init=/init cma=256M panic=10
volumioarg=imgpart=/dev/sda2 imgfile=/volumio_current.sqsh rw rootwait
Now we have a SD card to boot root file system on the SATA device.
It’s easier to prepare the root filesystem on HDD. Just need to dd the original official released image to the HDD like a SD card. Then expand or resize the root fs like normal. Then power it up.
Now enjoy.